
Executive Summary
- Custom furniture failures in Atherton are rarely “taste” problems; they are tolerance, measurement, and sequencing problems that show up at install.
- The highest-risk decision is locking dimensions from drawings instead of from verified site conditions after the surfaces that define reality are installed.
- Most expensive rework happens when millwork collides with MEP: electrical boxes, low-voltage, HVAC returns, sprinklers, and lighting zones.
- Control risk by treating shop drawings as a contract for interfaces: what touches what, how it’s serviced, and who owns field verification.
- If you want a Placerville maker (or any remote shop) to succeed in Atherton, build a measurement and approval protocol that does not rely on “as-built” assumptions.
Definition
A custom furniture maker builds one-off pieces (tables, banquettes, credenzas) and often adjacent “architectural furniture” such as built-ins, wall systems, and integrated storage. In high-end Atherton homes, the boundary between furniture and construction blurs: the piece may depend on framing straightness, finished floor height, wall plane flatness, electrical locations, HVAC airflow, and access panels. That boundary is where most failures occur because construction tolerances and cabinetry tolerances are not the same problem.
In practice, “fits on paper” is not a meaningful standard for custom furniture. The only standard that prevents rework is interface fit: the piece must reconcile with finished floors, finished wall planes, exact outlet and vent locations, and real service access constraints. If any of those conditions are unknown at fabrication release, the project is purchasing uncertainty, and the bill arrives at install.
Direct Answer Paragraph
If you have access to a high-quality furniture maker (including a trusted shop in Placerville), you can hire them directly, but only if you also establish a designer-led or architect-led coordination protocol that assigns responsibility for field verification, interfaces, and change control. Without that, the maker will build to drawings, the site will drift during construction, and the piece will “arrive correct” yet still not fit. The practical rule is simple: the more a piece touches the building (walls, ceilings, floors, MEP, built-in lighting, acoustic layers), the more it should run through an interior designer or architect who can control sequencing, approvals, and trade coordination.
The decision is less about “who is talented” and more about who can govern the interfaces. A furniture maker is optimized to fabricate; a designer or architect is positioned to coordinate the building interfaces that determine whether fabrication lands cleanly.
Why This Design Problem Exists
Atherton projects concentrate three risk multipliers in the same place: complex architecture, high-finish expectations, and tight integration between interior elements and building systems. Complex geometry (tall ceilings, long wall runs, window grids) increases the surface area for cumulative tolerance error. High-finish work reduces the margin for concealment because reveals, shadow lines, and panel alignments function like measurement devices. Integration increases failure modes because a millwork wall is not just “woodwork”; it is also an HVAC interface, an electrical and low-voltage zoning problem, and a maintenance-access problem. In fragmented construction delivery models, these interfaces are often not owned by any single party, which increases rework and schedule impacts in predictable ways.
Diagnostic Table
| Symptom on Install | Root Cause Mechanism | What Was Locked Too Early | Field Fix That Usually Happens | What You Should Specify Up Front |
|---|---|---|---|---|
| Built-in looks “crooked” across a long wall | Wall plane is not straight; framing and drywall introduce bow/twist over distance | Panel widths, ladder rails, or shelf alignment to an assumed straight line | Scribing panels, adding filler strips, re-cutting rails, compressing reveals | Measured “control line” after drywall and prime; tolerance budget and scribe zones |
| Banquette seat height clashes with window mullions | Finished floor height changed due to underlayment, leveling, flooring thickness | Seat height and back angle relative to glazing datum | On-site trimming, reworking base, altering cushion thickness | Floor assembly stack-up confirmation and final measure after flooring install |
| Media wall blocks HVAC return or reduces airflow | MEP locations set before shop drawings; return path not coordinated with millwork cavity | Back panel depth and sealed cavities | Cut hidden vents, add transfer grilles, redesign speaker cavities | MEP overlay review; service access plan; airflow path maintained |
| Closet island too heavy or damages floors | Load assumptions wrong; delivery assembled; floor protection plan missing | Assembly method and staging route | Disassemble in place; rebuild in sections; add temporary protection | Delivery logistics plan, floor protection spec, and sectioning requirements |
A useful diagnostic habit is to stop treating “final measure” as a single moment. For long pieces and mechanical systems, final measure is a sequence of checks: floor plane, wall plane, and interface clearance. When those checks are not performed (or not owned), the project shifts from planned fabrication to improvisational integration.
Deep Analytical Sections
Why Custom Furniture Decisions in Atherton Carry Real Financial Risk
One-off fabrication concentrates cost into irreversible operations: material selection, joinery, veneering, finishing, and hardware integration. Once fabrication starts, change orders are not “editing a drawing”; they become destructive rework that can waste material, burn shop time, and force re-finishing across visible surfaces to achieve color and sheen continuity. The financial risk is amplified when a shop quotes from concept drawings without a defined field verification milestone because the shop’s risk premium is unknowable until site conditions are measured. This is a predictable governance problem: when scope is not defined at the interface level (what touches what), the project pays for ambiguity later through rework and schedule compression.
When Custom Furniture Dimensions Must Be Locked (and When They Shouldn’t Be)
Dimensions should be locked when the surfaces that define the dimension are real and stable. In practice, that means: after framing is complete for rough coordination, after drywall is installed (and ideally primed) for plane confirmation, and after finished flooring is installed for height-critical pieces. Locking earlier is sometimes necessary to meet lead times, but it must be done with explicit tolerance and adjustment strategies (scribe zones, filler panels, adjustable levelers, removable backs, and field-trimmable components). A piece is lowest risk when its “hard dimensions” reference control datums that will not move (structural slab edges, verified centerlines, or documented finished floor elevations) rather than assumed drywall-to-drywall distances.
Sequencing: Where Custom Furniture Fits Into the Construction Timeline
Sequencing is not just scheduling; it is preventing incompatible assumptions from becoming irreversible work. Architectural drawings communicate intent; shop drawings communicate manufacturing and interface commitments. The gap between them is where projects fail: shop drawings often get approved to maintain momentum, while the site is still drifting due to framing variability, late MEP revisions, and finish stack-up decisions. When fabrication lead times run long, teams feel pressure to “release to shop” before the site is ready; that is a governance decision that should require a documented tolerance plan and a clear assignment of who owns the final measure. Industry research consistently points to fragmentation and poor coordination as drivers of delay and rework; custom interiors behave like miniature capital projects inside the larger project, so the same failure mechanics apply at a smaller scale.
Contractor Coordination Failures That Ruin Custom Pieces
The most damaging coordination failures are not aesthetic; they are physical collisions that force either the building or the furniture to compromise. Common examples include electrical rough-in landing in cabinet voids, recessed lighting conflicting with shelf heights, HVAC supply/return placement within millwork zones, and low-voltage pathways (Wi-Fi access points, AV conduits) that were not reserved early. These are preventable through interface overlays: a combined drawing review where the millwork shop drawings are overlaid with reflected ceiling plans, electrical plans, HVAC plans, and panel/service access requirements. If the project lacks a disciplined overlay review, the field crew becomes the “integrator,” which is the most expensive and least predictable integration method.
Living-in-Place Realities When Large Built-Ins Are Installed
Large built-in installation is a multi-day operation that can materially affect indoor air quality, dust load, and access to circulation paths. Field scribing, adhesives, touch-up finishing, and hardware tuning are not “clean room” processes; they can contaminate adjacent finished surfaces if containment and protection are not specified. If a home is occupied during install, plan for temporary loss of room function and plan the staging route to protect floors, walls, and stair noses. The risk mechanism is straightforward: the more the installation relies on field correction, the longer the home stays in a partially unfinished state, and the higher the probability of damage to surrounding finishes.
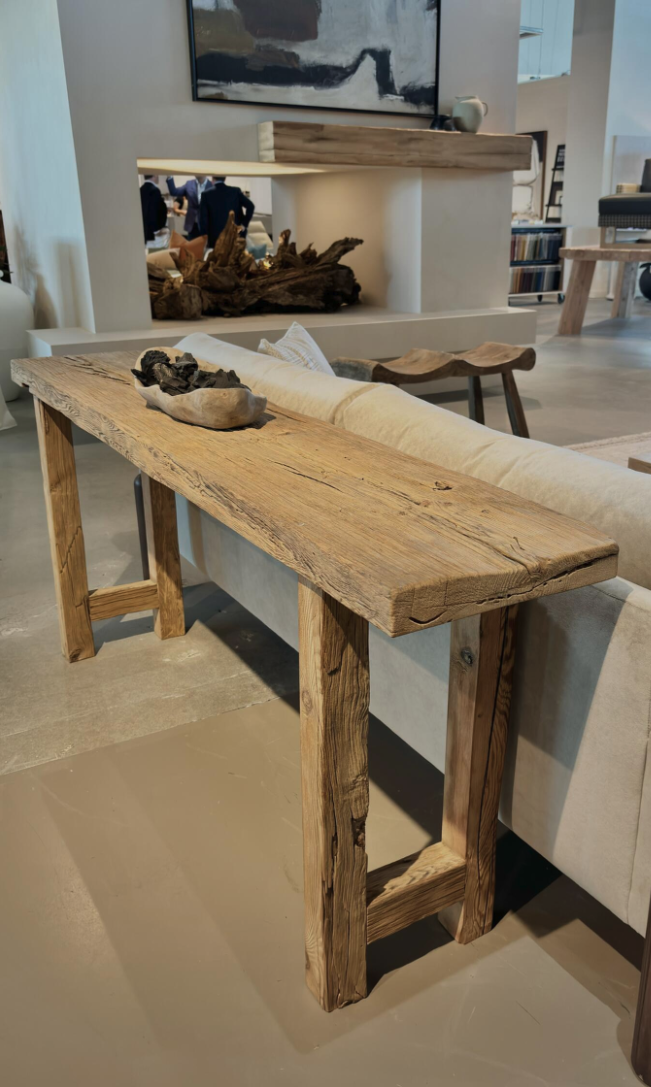
This is where Atherton projects often mis-assign risk: a space can look finished and still be mechanically unready for precision casework. “Paint is done” does not mean “plane is controlled,” and “flooring is installed” does not mean “flat enough for long, stiff furniture with moving parts and brittle tops.”
Observed Failure Mode Related to the Article Topic
On an Atherton remodel, we commissioned a local custom furniture maker to build a wall-length credenza with integrated tambour doors and a stone top to sit tight to a new 15-foot multi-slide door. The failure showed up during my pre-install verification: I put a laser level across the finished floor and then used a tape measure to confirm the toe-kick reveal at three points. The right end was 3/8" higher than the left across an 11' run, which meant the credenza would rack, the tambour tracks would bind, and the stone top would telegraph the twist once it was set and shimmed.
I only noticed because the room was “done enough” for everyone to assume it was safe: baseboards were on, paint was complete, and the electrician had already cut in the floor outlet for the lamp circuit behind the credenza. The moment I saw the bubble drift on the level, we pulled the vent register and I pushed an inspection camera into the cavity to check what the subfloor and underlayment stack looked like at the slab transition. That’s when it stopped being a furniture problem and became a sequencing and substrate problem.
Why the design should have worked, and why it didn’t
On paper, the design mechanism was straightforward: a rigid casework box would sit on a continuous, flat plane; adjustable levelers would take out minor variation; the tambour door system would run square to the face frame; and the stone top would be supported on a stable, coplanar perimeter. In reality, the credenza was being installed across two different floor assemblies: a floated engineered wood system over a slab in the main room, and a thinner build-up at the adjacent return where the GC had feathered patch to meet a threshold detail. The floated floor moved slightly under point loads, and the feathered patch compressed differently, so “flat enough for flooring” was not “flat enough for a long, stiff piece of custom furniture with tight mechanical tracks.”
The failure mode wasn’t aesthetic—it was mechanical tolerance. The tambour door needed a consistent reveal and a square opening; racking the cabinet by shimming corners would turn the door path into a parallelogram. The stone top added another constraint: stone doesn’t like twist. If we forced the cabinet into plane with aggressive shims, the stone would either rock, crack at a weak vein, or require a thick adhesive bed that would be prone to shear later when the floated floor moved seasonally.
How we diagnosed it, who confirmed it, and what we ruled out
My first hypothesis was that the cabinet shop had built out of square or the delivery had torqued the case. We ruled that out by measuring diagonals on the carcass in the driveway before bringing it in and confirming the shop’s internal bracing was intact. Next, I suspected a single high spot in the flooring. We mapped the floor with a laser level and marked elevations every 24" with painter’s tape, then compared those marks to the cabinet’s footprint and the planned scribe lines. The pattern wasn’t random; the slope changed exactly where the floor assembly changed, which pointed to substrate build-up rather than a one-off flooring defect.
The flooring installer and GC both came over, and we pulled one baseboard section to expose the expansion gap and underlayment edge. The flooring installer confirmed it was a floated system with the required perimeter movement gap, which meant we couldn’t pin the credenza through the floor or rely on the floor to behave like a structural plane. The GC’s superintendent confirmed the feather patch at the return was a late fix after the electrician chased a trench for the floor outlet and the patch was never re-checked for flatness against the cabinetry tolerance. No inspector flags that level of flatness for finished flooring, but it matters for long casework with moving parts and a brittle top.
What it cost, how it hit the homeowners, and what changed in my workflow
The consequence was immediate: we had a two-week delay because the stone template was scheduled for the next day and we had to cancel, then re-sequence the trades. The homeowners were living in the house, and the room became a no-go zone again—furniture moved out, dust control went back up, and the GC had to reopen finished surfaces to correct the substrate. The cost was not just labor; it was remobilization, storage for the credenza, re-templating fees, and the risk of damage to a finished floated floor when we brought the cabinet in twice.
What I missed was assuming the flooring “handoff” implied cabinetry readiness. Since that job, my process changed: for any Atherton custom furniture maker piece longer than 8' or involving mechanical systems (tambour doors, pocketing panels, integrated hardware tracks) or stone tops, I require a documented floor flatness check in the installation zone before the shop releases from fabrication hold. I also force a hard coordination point with the electrician and flooring installer so floor outlets, trenches, and patch repairs are completed—and re-verified—before final dimensions are signed. That one scar taught me to treat custom furniture like precision equipment: it needs a stable plane, controlled tolerances, and sequencing discipline, or it will fail in ways that look like “bad craftsmanship” even when the cabinet is built correctly.
How I balance contractors without turning the project into a power struggle
That credenza issue is also where my philosophy becomes practical: I’m not trying to “win” against a GC, a flooring installer, or a cabinet shop. I’m trying to protect the homeowner from rework by assigning ownership to the interfaces that actually fail. In Atherton-scale work, most disputes are not about intent; they are about who is accountable for the plane, the datum, and the tolerances when multiple trades touch the same outcome.
My operating rule is to treat contractors as domain owners, but not sequence owners. The flooring installer owns the floor assembly. The cabinet shop owns the carcass geometry. The GC owns substrate corrections and trade coordination. I own the verification protocol and the decision locks. If I don’t make that explicit, the project drifts into “everyone did their part,” while the piece still fails because the seam between parts was never governed.
In the credenza case, the temptation was to frame it as craftsmanship: “the cabinet doesn’t sit right.” That would have been wrong and expensive. The real mechanism was substrate inconsistency across two floor assemblies and a late electrical trench and patch that was never re-checked against cabinetry tolerance. Once you name the mechanism, the tone changes: instead of blame, the conversation becomes scope and sequence. We didn’t ask the cabinet shop to rebuild; we asked the GC to restore a stable plane and asked flooring to confirm how the floated system would move under point loads so the stone top wouldn’t inherit the floor’s behavior.
This is the same logic I use across Atherton estates when owners ask for “calm” and “quiet” outcomes. Those outcomes don’t come from stronger opinions; they come from sequencing discipline and performance-first assemblies: stable planes for precision work, predictable service access, and boundary decisions (openings, thresholds, maintenance paths) treated like engineered systems rather than finish moments. If you want the broader framework behind how I think about operational calm, privacy performance, and long-horizon durability in Atherton homes, it’s documented here: San Mateo Atherton Sovereign Sanctuary Interior Design for the Atherton Estate.
Practically, this is how I prevent contractor conflict while still enforcing outcomes: I create a short “handoff gate” list tied to installation readiness. For long custom pieces and mechanical systems, the gate is not “finish complete.” The gate is: verified plane in the install zone, verified interface clearances, and written confirmation that no late trenches, patches, or outlet moves are pending inside the footprint. When a contractor misses a gate, I don’t escalate emotionally; I escalate procedurally by resetting sequence and documenting why the interface can’t be signed yet.
That approach protects relationships because it removes ambiguity. Contractors don’t have to guess my expectations, and homeowners don’t get forced into paying for integration mistakes. The goal is not to slow the job down. The goal is to stop paying twice for the same room—once to build it, and again to correct it when precision furniture exposes what the eye couldn’t see.
Implementation Framework
1) Decide who owns field verification
Assign a single party to sign off on “final measure” and define what final measure means (which surfaces, what finish stage, what tools, what datums). If the furniture maker is remote, this step becomes more important, not less, because travel constraints and schedule slippage tend to push teams toward building from drawings. The goal is to prevent “nobody owns the tape measure” from becoming a project risk.
2) Treat shop drawings as interface contracts
Shop drawings should not be approved as “looks good.” They should be reviewed for: service access (panels, valves, electrical), airflow paths (returns, transfer), clearances (doors, drawers, ladder rails), and dimensional dependencies (finished floor elevations, ceiling planes, window grids). Approval should be conditional if the site is not ready for final measure, with explicitly identified placeholders and adjustment strategies.
3) Build a tolerance budget and expose it early
Define where you will hide variability: scribe zones at walls, adjustable feet, filler panels, or shadow reveals that can absorb drift without looking like a patch. The mechanism here is cumulative error: small framing and drywall deviations become visible when a long, straight millwork line is installed. If you do not define where variability goes, the installer will decide in the moment, which usually harms symmetry and alignment.
4) Schedule an overlay coordination review with trades
Hold a coordination review using the latest MEP drawings and the latest millwork drawings. The purpose is collision avoidance, not aesthetics. Require explicit sign-off on any location where millwork and MEP overlap: HVAC returns and supplies, electrical boxes, low-voltage pathways, and lighting zones. This is a small investment that avoids high-cost field rework.
5) Define a change-control rule before fabrication starts
Once fabrication begins, changes should trigger a written impact review: what rework is required, what finish continuity risk is created, what lead time shifts, and what scope trade-offs become necessary. The point is to prevent “small changes” from becoming multi-trade ripples that degrade schedule certainty.
Strategic Risks & Hidden Costs
Hidden cost: schedule collisions between lead times and construction readiness
Long lead times tempt teams to release fabrication early. When the site is not ready, the project later pays for interface fixes: scribing, re-cutting, re-finishing, and re-coordination. This is a classic productivity and fragmentation trap: speed in one phase creates rework in another, which overall slows the project and raises cost.
Hidden cost: “serviceability debt” in media walls and built-ins
Media walls, integrated lighting, and concealed wiring create maintenance obligations. If service access is not engineered (removable panels, access doors, pathways for replacement), you create a future failure mode where small repairs require destructive demolition of finished surfaces. This is not theoretical: electrical and AV components have finite lifespans and replacement cycles, while millwork is expected to last decades.
Hidden cost: finish-matching risk after rework
Wood and finish systems are sensitive to batch variation, environmental conditions, and re-finishing boundaries. When a built-in requires field modification after finishing, you increase the risk of visible mismatches in sheen, tone, or grain continuity. The mechanism is material reality: finishes are systems with variability, and “spot fixes” often telegraph under certain lighting angles.
Steel-Man Counterpoint
Hiring a furniture maker directly can be the right decision when the piece is truly freestanding, has minimal building interfaces, and you are willing to accept that the building will not be altered to accommodate the furniture. A disciplined shop can also reduce ambiguity by providing robust shop drawings and insisting on final measure before release. If the maker has repeat experience with high-end residential tolerance management and is set up to perform site verification, direct hire can reduce intermediaries and improve accountability. The risk is not direct hire itself; the risk is direct hire without a defined coordination and verification protocol.
Design Studio Integration
The interior designer’s value in custom furniture is not “style selection”; it is systems integration. A designer can manage: (1) measurement timing tied to construction milestones, (2) interface overlays across trades, (3) approval governance for shop drawings, (4) tolerance strategies that preserve alignment, and (5) installation logistics that protect finishes. In Atherton projects, these tasks function like micro-project management within the interior scope because custom furniture behaves like a built system, not a retail purchase.
If you are scoping a full project rather than a single commissioned piece, see our broader guide to working with an interior designer in Atherton for how studio-led coordination, sequencing, and trade governance are structured across an entire home.
Realistic Residential Scenario
You are in a major remodel or new build with tall ceilings and long wall runs where stock furniture does not scale correctly. You want a walnut library wall, a media wall, and a window-aligned banquette. The project schedule pressures you to release to fabrication before drywall and flooring are complete. The risk-controlled path is to separate “design intent approval” from “fabrication release”: approve the concept and materials early, but delay final dimensions until the site surfaces that define the fit are complete. If lead times force partial release, you define scribe zones and adjustable conditions explicitly, and you hold an overlay review with HVAC, electrical, and low-voltage before anything is built that would block access or airflow.
FAQ
Do I hire a custom furniture maker first or an interior designer first?
If the piece touches the building (built-ins, media walls, banquettes integrated to windows), hire the interior designer or architect first to set sequencing, verification, and coordination rules. If it is freestanding and independent of site conditions, you can hire the maker directly, but still define measurement and delivery criteria.
Why is custom furniture so expensive compared to high-end retail pieces?
Custom work concentrates labor, engineering, and finishing into a single piece with no economies of scale. You are also buying risk management: measurement, drawings, prototyping, and installation correction if the building deviates from assumptions.
How long does custom furniture usually take to build?
Lead time depends on shop capacity, material availability, and finish system complexity. The reliable planning mechanism is not guessing a duration; it is aligning decision lock points with the shop’s required release milestones and the site’s readiness for final measure.
What happens if the furniture doesn’t fit once it arrives?
Either the piece is modified (scribing, trimming, rebuilding sections), the building is modified (moving electrical, altering drywall, adjusting returns), or both. The cost and disruption depend on whether the design included tolerance strategies and whether service access and airflow were protected.
Can custom furniture be changed after it’s built?
Sometimes, but changes often require destructive rework and re-finishing, which introduces finish-matching risk and schedule impacts. The safest approach is to treat final measure and shop drawing sign-off as a formal “point of no return” with a documented change-control rule.
Why do built-ins sometimes look different than the design drawings?
Design drawings show intent; shop drawings and the field show constraints. When site conditions drift (wall bow, floor height changes, MEP placements), the installer must absorb variability somewhere, and that can compress reveals, shift alignments, or alter proportions.
Is it cheaper to build furniture during construction or after move-in?
During construction can be cheaper if coordination is disciplined because access is easier and surfaces can be protected. After move-in can be more expensive because containment, protection, and disruption increase, and because the installation may require field finishing in occupied conditions.
Citations
McKinsey (MGI) – The construction productivity imperative (PDF)
McKinsey (MGI) – Reinventing construction: A route to higher productivity (Full report PDF)
Deloitte – 2026 Engineering and Construction Industry Outlook
PwC – Correcting the course of capital projects (PDF)
PwC – Capital projects: cost overruns and delays (survey findings)
Reference Links
Designed + Curated Sacramento on Pinterest (Sacramento Interior Design Inspiration)
Designed + Curated Interiors on LinkedIn (Sacramento Interior Design Studio)